Train and Deploy A Transformer Model-Mixed Precision Training and Deployment with ONNXRUNTIME
Step by step guide on training and deploying a transformer encoder network

Training a NLP (Natural Language Processing) Model
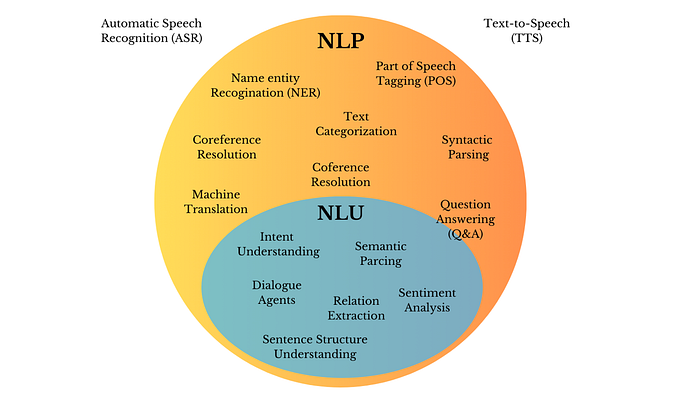
Natural Language Processing (NLP) is the aspect of machine learning that creates Artificial Intelligence tools that are capable of understanding and interpreting texts. NLP has been used in solving a lot of problems in natural language understanding, ranging from text classification, text generation, and language translation to question and answering. In this article I am going to discuss a basic step by step guide on training a Multiclass Text Classifer model with a Transformer encoder network using Mixed Precision Training and how to deploy the trained classifier model with ONNXRuntime.
What is Text Classification
Text classification is the ability of NLP models to understand the contextual meaning of a sentence and classify it based on a predefined set of categories or classes.
Perequisites
- Basic knowledge of the Pytorch Deep Learning Library
- Familiar with training a machine learning model.
Install Required Packages
Install Pytorch
Install pandas for Data Processing
pip install pandasInstall tiktoken for Text Tokenization
pip install tiktokenClone Code repository
git clone https://github.com/ayoolaolafenwa/TrainNLP.git
cd TrainNLP/trainClassifier
The folder textClassifier contains codes for training the classifier model and the directory looks like this:
textClassifier
--AGNewsData
      --train.csv
      --test.csv
   transformer_encoder.py
train_classifier.py- AGNewsData: It contains the data to be trained.
- transformer_encoder.py: It contains the custom implementation of the transformer encoder network.
- train_classifier.py: It contains the code for training the transformer encoder network.
AGNewsData
This is a news dataset containing 120000 news samples for training and 7600 news sample for testing. AGNews Dataset has four categories which are World, Sports, Business and 4-Sci/Tech . It has two files train.csv and test.csv.
Load and Read Data with Pandas
Check the AGNews data csv file using the script below.
import pandas as pd

def load_data(data_path):
    data = pd.read_csv(data_path)
    return data

data = load_data("AGNewsData/train.csv")
print(data.head(5))
Output
Class Index                                              Title                                        Description
          3  Wall St. Bears Claw Back Into the Black (Reuters)  Reuters - Short-sellers, Wall Street's dwindli...
          3  Carlyle Looks Toward Commercial Aerospace (Reu...  Reuters - Private investment firm Carlyle Grou...
          3  Oil and Economy Cloud Stocks' Outlook (Reuters)  Reuters - Soaring crude prices plus worries\ab...
          3  Iraq Halts Oil Exports from Main Southern Pipe...  Reuters - Authorities have halted oil export\f...
          3  Oil prices soar to all-time record, posing new...  AFP - Tearaway world oil prices, toppling reco...
I printed five samples from the train data. We have three columns: Class Index, Title and Description. Class Index represents the dataset’s numerical label and there are four labels: 1-World, 2-Sports, 3-Business, 4-Sci/Tech .
Process Data CSV file
I defined the load_data function that will handle the loading of the dataset csv files and made the required modifications to the files.
I combined the two columns Title and Description into a single column text and dropped them. I renamed the Class Index column to label. The modified data has two columns label and text.
Output
        label                         text
           3     Wall St. Bears Claw Back Into the Black (Reute...
           3     Carlyle Looks Toward Commercial Aerospace (Reu...
           3     Oil and Economy Cloud Stocks' Outlook (Reuters...
           3     Iraq Halts Oil Exports from Main Southern Pipe...
           3     Oil prices soar to all-time record, posing new...
Pad Text Data:
Padding is an important requirement in NLP to set a threshold for every text sequence in the training data to be of equal length. Every NLP network requires padding for training text sequences. I will define a padding function that will process the text data and pad all text sequences’ lengths to be equal.
The pad_tensor takes in the parameters
- source: this is the text sequence from the input dataset.
- seq_len: this is the required length of a text sequence.
- padding_value: this is the value that will be used to pad a shorter text sequence to the required length.
I created a tensor of zeros for padding shorter sentences. When the text sequence is shorter, it is padded with zeros to match the required text sequence length. When it is longer than the required text sequence length, it is truncated.
Helper Python Class to process Text Data
I defined a class DatasetProcessor which prepares the text data for training and validation.
The class DatasetProcessor inherited the pytorch inbuilt Dataset class and performed the following tasks:
- Subtracted one from the dataset’s labels to start from 0, because the numerical labelling in the dataset starts from 1.
- Converted text data and labels to pytorch tensors
- Padded the converted text tensors with the padding function pad_tensor.
- Appended the padded text tensors into a list
- Appended the labels into a list
- Concatenated the texts and labels lists.
It has extra functions num_classes and python dunder functions __len__, and __getitem__ .
- num_classes: It obtains the total number of the classes in the dataset.
- __len__: It returns the length of the concatenated text data.
- __getitem__: It returns the input text and its corresponding label.
Create DataLoaders for Train and Test Datasets
I created a function data_handler to handle the creation of data loaders for loading the prepared text data for training and validation.
data_handler performs the following functions:
- Loaded the train and test datasets using load_data function .
- Processed the loaded train and test data with the class class DatasetProcessor .
- Created Pytorch data loaders for both train and test data.
- Finally returned the train data loader, test data loader and the number of classes in the dataset.
Done with defining helper functions and class for processing the AGNews dataset, the next step is to discuss the training strategy for training the dataset.
Training Strategy
I am going to train the dataset with Mixed-Precision Training and Gradient Clipping.
Mixed-Precision Training
Mixed Precision Training is a training strategy for training deep learning models faster by training data in FP16 (half-precision floating point) compared to the standard training that train data only in FP32 (single-precision floating point). Training in FP16 uses half of the memory used by FP32. Mixed precision training is the use of both FP32 and FP16 precisions for training deep learning models which makes training faster. Pytorch has inbuilt methods that make it easy to perform Mixed-Precision Training. I am going to work with Pytorch autocasting and scaling for Mixed-precision training.
- Autocasting: It is a method in pytorch that casts training data into FP16-precision for Mixed-Precision training.
- Scaling: It is used to scale gradients during training to prevent underflow(it is a condition in which gradients with smaller magnitudes vanish to zero). Scaling solves the underflow problem by multiplying model’s gradients with a scalar factor to magnify them and prevent reduction to zero.
Gradient Clipping to prevent Overflow
Overflow: It is a condition during training when model’s gradients become very large and cause exploding of gradients(unstable training leading to unstable large updates to the weights and parameters of the model).
Gradient Clipping: It is a training strategy in which we set a threshold value for the model’s gradients maximum size and if a model’s gradient is beyond this value the gradient will be clipped.
Finally I will discuss the training steps where I will use Mixed Precision Training and Gradient Clipping to train the AGNews dataset.
Training Code Steps
Create Useful Arguments
I created arguments for setting parameters for training and validation.
import argparse

args = argparse.ArgumentParser()

args.add_argument("--data", type = str, required=True)
args.add_argument("--output_dir", type = str, required=True)
args.add_argument("--epochs", type = int, required=True)
args.add_argument("--batch_size", type = int, default=32)
Arguments’ parameters:
- data: it sets the data directory for training and validation.
- output_dir: it sets the output directory where the trained models will be saved.
- epochs: it sets number of epochs for training
- batch_size: it sets the batch size for training.
Create Training Class
I created a class Trainer to handle all the steps for training and validation.
Line 1–5
- Imported Adam optimizer.
- Imported tiktoken package.
- Imported the Transformer encoder (TranformerClassifierModel)model from the python file transformer_encoder.py.
- Imported torch.nn package.
Line 10–16
- Defined the text sequence length seq_len to 256.
- Defined the tokenizer text_encoder for tokenizing the dataset. I used GPT pretrained tokenizer from tiktoken package for tokenizing the text data.
Tokenizer is used for tokenization. Tokenization is a method that is used for converting text data to numerical values or integers. It is required to transform text data to integers, because neural networks can work only with numbers it cannot work with text data.
- Defined the vocabulary size vocab_size from the tokenizer.
Vocabulary Size is the total number of words that will be supported by the model.
- Defined the batch size from the argument parser.
Line 19–25
- Defined the gradient clipping value gradient_clip to 1.0 for gradient clipping.
- Set GPU device for training.
- Defined the learning rate for training.
- Set the output directory for saving trained models.
Line 27–30
- Initialized the best accuracy value best_acc to 0.0 which will be useful later for saving best trained models based on accuracy.
- Obtained the data loaders for training, testing and the number of classes in the dataset from the data_handler function.
Line 33–36
- Defined the transformer model from the TransformerClassifierModel and moved the model to GPU device.
Line 39–42
- Set the optimizer to Adam
- Set the loss function to CrossEntropy Loss
- Set the gradient scaling function using torch.cuda.amp.GradScaler(enabled=True) for scaling the model’s gradients.
Process Data for Training and Validation
I defined function process_batch within the Trainer class to process data during training and validation.
What happened within the process_batch
The function accepts two parameters: text and label and performs the following tasks:
- Texts and labels are moved to the GPU device.
- Autocasting was initiated for training the model in Mixed-Precision and it wrapped the forward pass: “The model generated predictions on the text. The model loss was computed to find the differences between the predictions and the labels. “
Define function to save models during training
I defined a function save_best within the Trainer class to handle the saving of best trained models during validation based on the validation accuracy.
def save_best(self, epoch, acc):
    model_path = os.path.join(self.output_dir, f"best_epoch{epoch}_acc_{acc:.3f}.pth" )
    torch.save(self.model.state_dict(), model_path)
Define Test Function
I defined a function test within the Trainer class to handle the validation of trained models.
Line 2–5
- Initiated model in evaluation mode
- Set the values all_acc and total_count to 0. all_acc is an holder for appending the accuracy and the total_count is the holder for appending the count of the text labels during validation.
- Set the all_loss holder for appending the loss during validation.
Line 6–12
- Iterated through the test data loader to obtain the corresponding text and label. The forward pass was wrapped within torch.no_grad.
- Obtained the loss and accuracy from the process_batch function.
- Appended the computed accuracy to the all_acc holder
- Appended the computed loss to the all_loss holder.
- Appended the labels count to the total_count holder.
Line 14–20
- Computed the test accuracy by dividing the total accumulated accuracy by total_count.
- Computed the loss by summing up the accumulated loss and dividing the sum by total_count.
- Checked if the current accuracy is greater than the best accuracy, save the model if it is and set the best accuracy to the current accuracy.
- Finally returned the loss and accuracy
Define Train Function
Finally I defined the train function that will train the AGNews dataset.
Line 2–5
- Initiated the model for training
- Set the values all_acc and total_count to 0. all_acc is an holder for appending the accuracy and the total_count is the holder for appending the count of the text labels during training.
- Looped through the number of epochs, performed an inner loop to obtain the text and corresponding label for training for each epoch. The following actions took place within the inner loop.
Set the optimizer to zero gradients
Obtained the loss and accuracy computed from process_batch function.
Scaled the model’s gradients using scalar.scale() to prevent very small gradients from vanishing to zero.
Unscaled the model’s gradients using scalar.unscale_() before updating the model’s parameters to prevent the scalar factor used in scaling model’s gradients from interfering with the model’s parameters such as learning rate.
Applied gradient clipping using clip_grad_norm_() to prevent model’s gradients overflow.
Used scalar.step() to skip optimizer.step() if the model’s gradients contain infs or NaNs.
Updated model’s parameters using scalar.update() .
Full Code for Training
This is the full code consisting of all the steps for processing the AGNews dataset, training and validating it.
Run Training script Using:
python train_classifier.py --data AGNewsData --output_dir SavedModels --epochs 5 --batch_size 128I ran the training script with 5 epochs with a batch size of 128 and the output directory for saving the trained model is set to SavedModels.
The training log will look like this:
Dataset Classes:  4
Training Epoch 0
100%|████████████████████████████████████████████████████████████████████████████████| 938/938 [01:26<00:00, 10.84it/s]
Validating Epoch 0
100%|██████████████████████████████████████████████████████████████████████████████████| 60/60 [00:01<00:00, 33.95it/s]
Epoch: 0, Train Acc: 0.727, Train Loss: 0.647, Test Acc: 0.874, Test Loss: 0.357
Training Epoch 1
100%|████████████████████████████████████████████████████████████████████████████████| 938/938 [01:25<00:00, 10.97it/s]
Validating Epoch 1
100%|██████████████████████████████████████████████████████████████████████████████████| 60/60 [00:01<00:00, 36.46it/s]
Epoch: 1, Train Acc: 0.814, Train Loss: 0.467, Test Acc: 0.895, Test Loss: 0.310
Training Epoch 2
100%|████████████████████████████████████████████████████████████████████████████████| 938/938 [01:30<00:00, 10.36it/s]
Validating Epoch 2
100%|██████████████████████████████████████████████████████████████████████████████████| 60/60 [00:01<00:00, 31.46it/s]
The models will be saved based on the test accuracy on the test dataset. The output directory during training will look like this:
SavedModels
  -- best_epoch2_acc_0.892
  -- best_epoch3_acc_0.915.pth
Good work! We are done training the model, the next step is to perform inference with the trained model to check if it can perform the task of classifying news.
Inference with Trained Model
Test your trained model or download the model I have trained on the dataset from here.
Code for Inference
This is the code for performing inference with the trained model.
Line 1–3
- Imported the transformer encoder network (TranformerClassifierModel) model from the python file transformer_encoder.py .
- Imported tiktoken package.
- Imported torch.
Line 5–14
- Defined a function to accept a model path, load the model and return the model for evaluation.
Line 16–25
- Defined the same padding function used during training to pad text to be inferred with the trained model.
I am going to test the model on a sample news extracted from WikiNews on the James Webb Space Telescope.
On Monday, NASA Administrator Bill Nelson and US President Joe Biden presented the first image (see left) obtained by the Near-Infrared Camera (NIRCam), an instrument on the James Webb Space Telescope.

The image, named Webb's First Deep Field, shows thousands of galaxies in the SMACS 0723 galaxy cluster, about 4.6 billion light-years away from Earth. However, the area shown by the image is only a small portion of the Southern Hemisphere sky. The blended image (at left) resulted from the stitching together of numerous smaller images obtained at multiple wavelengths with far greater depth than achieved by the Hubble Space Telescope, the predecessor to James Webb.

The telescope entered its current orbit around the L2 Lagrange point from January 24, about 1,500,000 kilometers (932,057 mi) from Earth, on the opposite side of Earth from the Sun. This followed a month-long journey that began in late December 2021, following years of delays and several cost overruns. For its expected five- to ten-year service life, it is intended to study the most distant, and therefore the earliest galaxies formed after the Big Bang.

During its journey, dubbed "30 days of terror" by Sky & Telescope, the telescope successfully unfurled its 21 feet (6 m) wide mirror, deployed its sunshield and cooled down to below 50 degrees Kelvin as it traveled to the L2 Lagrange point.

L2 is a secure location for spacecraft where the gravitational pull of the Sun and the Earth is balanced. Full scientific operations will involve thirteen teams of scientists. The primary mission is to find the most distant and earliest galaxies formed after the Big Bang to help study the origins of the Universe. The nominal mission time is five years, with a goal of ten. The location of its orbit is very different to the Hubble Space Telescope, which orbits much closer to Earth. James Webb's instruments face away from the Sun, giving a greater clarity to the images it will obtain compared to Hubble.

An Ariane 5 launch vehicle carried the telescope to space on December 25 from the Guiana Space Centre in French Guiana, after arriving at the launch site in October. The launch date was delayed by a week due to unfavorable weather.

The United States National Aeronautics and Space Administration (NASA) began project development in 1996, planning for a launch in 2007 at a cost of USD550 million. After NASA contracted Northrop Grumman to build the telescope, mission managers estimated a 2010 launch would cost between one and 3.5 billion USD. Redesigns to reduce technical requirements pushed launch plans to 2013 for an estimated cost of USD4.5 billion. The US Congress ordered a project review in 2010 which delayed the launch again to 2015.

Due to an estimated cost of USD6.5 billion, the United States House Appropriations Subcommittee on Commerce, Justice, Science, and Related Agencies proposed canceling the telescope altogether in 2011. After a plan was made for a 2018 launch at a cost of USD8.8 billion, technical errors found in the telescope and the subsequent COVID-19 pandemic pushed the launch date to 2021.Line 48–65
- Loaded the tokenizer from tiktoken.
- Tokenized the sentence.
- Loaded the model using the load_model function.
- Converted Tokenized text to pytorch tensor
- Padded the text.
Line 67–78
- Expanded the dimension of the padded text using torch.unsqueeze.
- Passed the unsqueezed text to the model to perform inference on it.
- Defined a dictionary to assign class names to the corresponding class numerical label.
- Obtained the outputs from the model’s predictions.
- Passed the model’s predictions to torch.argmax to obtain the maximum prediction.
- Converted the model’s maximum prediction from torch tensor to numpy array.
- Mapped the predictions to the class names in the dictionary.
- Finally printed the result.
Prediction Output
scienceThe prediction output class name is science.
The model is correct because a news on the James Webb Space Telescope that is used in observing the space is indeed a science news.
Check the text shape
 text = torch.unsqueeze(text, dim = 0)
 print(text.shape)
Output
torch.Size([1, 256])Check the text shape. It has a 1D shape which is [1, 256]: 256 is the shape of text sequence. The shape will be required for exporting the model later in this article.
The trained model is working fine and can classify news correctly! The next step is to deploy it to make it faster and suitable for deployment.
Deploy Trained Model
Model deployment is one of the most important aspects of deep learning. It is essential for improving the model speed and running the model independently in a production environment.
Deployment with ONNX Runtime
ONNX Runtime is one of the most used platform for optimizing and accelerating deep learning models. Read more about ONNX Runtime
Install ONNX Runtime
pip install onnxruntimeExport with ONNX Runtime
This is the code for exporting the trained model using ONNXRuntime.
Line 5–18
Defined the same load_model function used during inference of the trained model.
Line 21
- Loaded the trained model
Line 24
- Generated a tensor of zeros of shape (1, 256) to serve as input to export the trained model.
Line 26
- Exported the model using torch.onnx.export function which accepts the following parameters:
1. The loaded pytorch model.
2. The generated input data to export the model
3. The name to be given to the exported pytorch model which will be news_classifier.onnx.
4. The input_names for the model input which was given “input”.
5. The output_names for the exported model output which was given “output”.
Inference with Exported ONNX Model
Test the exported ONNX model with the script below.
Line 1–3
- Imported the onnxruntime package, tiktoken package for text tokenization and the numpy package for data processing.
Note: I did not import the Transformer encoder (TranformerClassifierModel) network and torch. This is because with onnx model you don’t need to import the entire model architecture for inference, the model architecture was already exported in the onnx model. There is no need to import torch, because numpy and tiktoken are enough for text processing.
Line 5–7
- Created a function for loading the ONNX model.
- Loaded the ONNX model for inference using ONNX Runtime InferenceSession.
I used the same news I used for testing the trained pytorch model to test if the exported onnx model will generate the same result.
The rest of the ONNX Runtime inference code is similar to the inference code used for the pytorch model except numpy was used for text processing.
np.expand_dims to expand the dimension of the text which does the same work as torch.unsqeeze.
Line 59–58
Loaded the onnx model and ran inference using:
outputs = onnx_model.run(None, {"input": text})
outputs = np.argmax(outputs[0], axis = 1)
Used np.argmax to obtain the maximum model prediction and printed the result.
Prediction Output
scienceGood! The same result was obtained for both pytorch and onnx model.I am going to test the onnx model on another news extracted from WikiNews on Australian women’s cricket.
Coolum claimed the premiership in the top tier of women's cricket on Australia's Sunshine Coast Sunday, defeating Hinterland by 83 runs in the Grand Final.

Batting first, Coolum scored 181 runs for the loss of 3 wickets off their allotted 30 overs.

3:26
Interview with Coolum captain Sammy Franks.
Audio: Patrick Gillett.
3:08
Interview with Hinterland captain and SCCA Women's committee chair Mel Shelley.
Audio: Patrick Gillett.
Batting after Coolum, Hinterland scored 98 runs for the loss of 8 wickets.

Coolum captain Sammy Franks said: "The girls played so well today. 181 with the bat, that's pretty solid [...] We knew we had to put a lot of runs on the board. Aiming for 140, 150. But yeah. 181, that was wonderful."

Two senior Coolum players, Kerry Cowling and Paula McKie, retired after the match.

Franks continued, "It was great to win. Give Kezza and Paula a final farewell. Yeah, Paula is retiring as well. It was a little bit of a secret. She's moving on to bigger and better things. We'll miss her. She was obviously vice captain, and cricket brain and always there for me.

"Kerry's done so much for the club. All the little things that didn't get seen. Cleaning the toilets, bringing the sausages, just organising the whole team, all of the admin stuff and just being there like a cricket mum to us," she said.Prediciton Output
sportThe model correctly classified the news as sport.
Note: AGNews is a simple dataset and the training parameters used like learning rate and optimizer may not generalize to a more challenging natural language understanding problem. If you want to train a more complex NLP model in text classification work on finding better parameters in terms of learning rate and optimizer.
Conclusion
In this article I wrote in detailed the step by step guide on training a text classifier model in pytorch using Transformer encoder network, employing Mixed-Precision technique for faster training, applying gradient scaling to prevent underflow of model’s gradients, gradient clipping to prevent model’s gradients overflow and deploying the trained pytorch model with ONNX Runtime. Text classification is used in categorizing documents, finding patterns in documents, web scraping and in businesses to promote business brands. In web scraping text classification can be used in categorizing web scrapped data. Text classification is used for analyzing texts and classifying the sentiments of texts to either positive or negative. Business organizations make use of text classification in analyzing product reviews, to differentiate positive and negative reviews.
If you enjoy this article, check this article I published explaining the concept of Transformers and how to train Masked Language Model using Huggingface.
Check TrainNLP repository
References
Reach to me via:
Email: olafenwaayoola@gmail.com
Linkedin: https://www.linkedin.com/in/ayoola-olafenwa-003b901a9/
Twitter: @AyoolaOlafenwa